Rebuilding a 3S.

Moderators: Administrator, Executive Members, Moderator Group

Re: Rebuilding a 3S.

Postby PearlWhiteMR2 » Sat Apr 14, 2012 11:52 pm

So finally after a two week wait I got the correct piston rings from lithia, who accidentally sent me rings for a 5sfe.

Put them in today, and got a lot of the engine back together!

The oil pan got sanded down, painted, and got a set of fresh new bolts!
Image

The assembled, sealed block with pistons.
Image

Got the head gasket and head on, cleaned the head bolts with a wire wheel, and torqued them all to spec.
Image

Hoses from hell, brand new! Nice and easy when they are this exposed.
Image

installed thermostat housing, water pump, cam gears, most of the pulleys except the idlers, dipstick tube, and now she sits.
Image

Found out my exhaust manifold was warped so its going to have to get planed, also need to get idler pulleys, install the fuel rail, intake manifold, turbo, harness, timing belt, crank pulley, alternator, starter, transmission, and then the fun part, the vacuum lines!

Will add more as I progress.
-Sarah
1985 MR2 - R.I.P
1991 MR2 Turbo
2013 Scion FR-S
Apprentice Tech at Valley Toyota
User avatar
PearlWhiteMR2
Grandfather '2
 
Posts: 1775
Joined: Mon Dec 22, 2008 12:11 pm
Location: Mission, BC, Canada
Status: Offline

Re: Rebuilding a 3S.

Postby immorality » Sun Apr 15, 2012 5:14 am

Looking good!

ps. Buy my ARP flywheel bolts.
User avatar
immorality
BCMR2 Web Admin & Executive Board Member
 
Posts: 9731
Joined: Thu Oct 31, 2002 1:32 pm
Location: Burnaby
Status: Offline

Re: Rebuilding a 3S.

Postby PearlWhiteMR2 » Sun Apr 15, 2012 9:10 am

How much? I'm pretty broke from this build already
-Sarah
1985 MR2 - R.I.P
1991 MR2 Turbo
2013 Scion FR-S
Apprentice Tech at Valley Toyota
User avatar
PearlWhiteMR2
Grandfather '2
 
Posts: 1775
Joined: Mon Dec 22, 2008 12:11 pm
Location: Mission, BC, Canada
Status: Offline

Re: Rebuilding a 3S.

Postby thelaw604 » Sun Apr 15, 2012 12:03 pm

Nice! Keep up the good work.
thelaw604
Baby '2
 
Posts: 215
Joined: Fri Feb 27, 2009 5:01 pm
Status: Offline

Re: Rebuilding a 3S.

Postby immorality » Sun Apr 15, 2012 7:18 pm

PearlWhiteMR2 wrote:How much? I'm pretty broke from this build already


They were $49 new from twos'r'us and all I did was take one out of the package to realize that they don't fit the V6's, shoot me an offer.
User avatar
immorality
BCMR2 Web Admin & Executive Board Member
 
Posts: 9731
Joined: Thu Oct 31, 2002 1:32 pm
Location: Burnaby
Status: Offline

Re: Rebuilding a 3S.

Postby PearlWhiteMR2 » Sun Apr 15, 2012 11:05 pm

Hmm... are they a really big deal or am I alright do you figure? I know you wanna sell them so here's your chance to make a pitch, because frankly I don't think I -need- to spend another lump of cash on something like that but who knows you might be able to sway me :)
-Sarah
1985 MR2 - R.I.P
1991 MR2 Turbo
2013 Scion FR-S
Apprentice Tech at Valley Toyota
User avatar
PearlWhiteMR2
Grandfather '2
 
Posts: 1775
Joined: Mon Dec 22, 2008 12:11 pm
Location: Mission, BC, Canada
Status: Offline

Re: Rebuilding a 3S.

Postby immorality » Mon Apr 16, 2012 5:44 pm

Well, since you asked...

Flywheel and bolts play an important role in the performance and safety of race cars and street machines alike. That’s why the fastener experts at ARP have developed special bolts that are far superior to OEM hardware. ARP offers two styles of Flywheel/Flexplate bolts: High Performance and Pro Series. They are both forged from aerospace alloy and heat-treated prior to thread rolling and machining. Both feature an exclusive, flat, 12-point head design and larger than stock shank diameter for increased strength and improved flywheel register. The popular High Performance Series is rated at 170,000 psi, and the premium grade Pro Series, originally developed for NASCAR Winston Cup competition, has a 190,000 psi rating.

These Pro series flywheel bolt kits from ARP give you all you need to bolt in your flywheel with confidence. They're much stronger than OEM hardware, are forged from aerospace alloy, and are heat-treated prior to thread rolling and machining. These bolts feature an exclusive, flat 12-point head design and a larger-than-stock shank diameter, for increased strength and improved flywheel register.

Apparently these are the Pro series if you look up the number 203-2801, but there's nothing specific written on the package.
User avatar
immorality
BCMR2 Web Admin & Executive Board Member
 
Posts: 9731
Joined: Thu Oct 31, 2002 1:32 pm
Location: Burnaby
Status: Offline

Re: Rebuilding a 3S.

Postby PearlWhiteMR2 » Mon Apr 16, 2012 9:07 pm

Hmm.. Interesting. I don't think its necessary for me though, thanks Russ. If I was going to be hardcorelike that I would've gotten arp head studs too and all that. didn't even know they made flywheel bolts, good to know!
-Sarah
1985 MR2 - R.I.P
1991 MR2 Turbo
2013 Scion FR-S
Apprentice Tech at Valley Toyota
User avatar
PearlWhiteMR2
Grandfather '2
 
Posts: 1775
Joined: Mon Dec 22, 2008 12:11 pm
Location: Mission, BC, Canada
Status: Offline

Re: Rebuilding a 3S.

Postby PearlWhiteMR2 » Sat Apr 21, 2012 8:42 pm

Making progress! Did some cleaning and polishing, painting of parts...

Image
Image

Cleaned the engine bay using degreaser, acid, and a pressure washer...
Image

And serviced all four brakes.. They went from sitting almost two years and looking like this...
Image

To this!
Image

more progress the next couple days!
-Sarah
1985 MR2 - R.I.P
1991 MR2 Turbo
2013 Scion FR-S
Apprentice Tech at Valley Toyota
User avatar
PearlWhiteMR2
Grandfather '2
 
Posts: 1775
Joined: Mon Dec 22, 2008 12:11 pm
Location: Mission, BC, Canada
Status: Offline

Re: Rebuilding a 3S.

Postby PearlWhiteMR2 » Mon Apr 23, 2012 9:40 pm

So I spent a lot of time on the engine this weekend, hoping to get it possibly running by tonight. I really should have learned by now that that isn't possible with MR2's! Stuff always goes wrong...

I started out with Saturday, I cleaned the axles, finished cleaning the transmission, and cleaned out the engine bay. I prepared several parts for painting, including the valve cover, hotpipe, coldpipe, and a few other bits. I decided to put the car up on the hoist and service all four brakes since they were rusted and looking like absolute garbage. I hadn't serviced the rear before and didn't realize that the piston is a threaded type and that the pads are a bit more of a PITA than most... so it took a bit longer than I thought and that service swallowed up the last part of the day.

Sunday I painted and had a technician friend make a block off plate for the oil level sender, since it was broken and no longer necessary. I don't need the dummy light to tell me when my oil is low anyhow.

Today was the big day. Brought in all painted parts and made a list, and got to it first thing in the morning. The block off plate went on, had to silicone it inside where there used to be an o-ring and silicone the outside as well. I was trying to put the exhaust manifold on but the studs were spinning as I torqued the nuts so we had to helicoil several of them. Kept putting the manifold back on to find another one would spin so had to keep taking it on and off... time was wasted there. Then a lot of time was spent just sorting through boxes looking for parts, and finding bolts and nuts for things. The intake manifolds stays had to go on, and the throttle body, routed and plugged in several coolant lines and vacuum hoses, and connectors.

Noted that the wiring going in to several connectors was hard and broken so it will have to be repaired at some point soon as well. If anybody has a harness for a 3S that's in good shape let me know! Now is the time to put it in :)

Then we put the turbo on. We did the nuts up on the manifold loosely and then tried to find the oil hardline but it's gone missing from all the parts boxes. If anybody has one of these, also... I need it. Had to take the egr apart and redo the ferrel inside that had come loose. This required heating the big nut on the egr pipe with a torch as it was quite rusted in place. Put the distributor o-ring in, distributor cap, and wires on once the valve cover was in place. We also had to replace one head stud that was not in very good shape.

The last thing today was when we were tightening the turbo up to the manifold, I guess it was quite warped and as we torqued them together, we heard a loud CRACK and there was a split in the iron casting of the flange on the turbo. So off to the welding shop it went, and hopefully they can fix it up nicely. It's an ATS CT27 so it's not easily or cheaply replaceable. We have to plane the surfaces as well, something that really should have been done beforehand but wasn't. Lesson learned here: don't skip anything when doing a rebuild that you think isn't necessary or you can do later... you'll waste more time fixing your mistakes and it's not easier.

So all in all, the engine is MOSTLY together. Once the manifold and turbo are taken care of, and I find a hardline, fix the harness, and track down a few more coolant hoses it'll basically be done. There are new axle seals for the tranny, and a new clutch and bearing for it as well so that can be bolted up once its done. After that, it's just a matter of dropping her in!
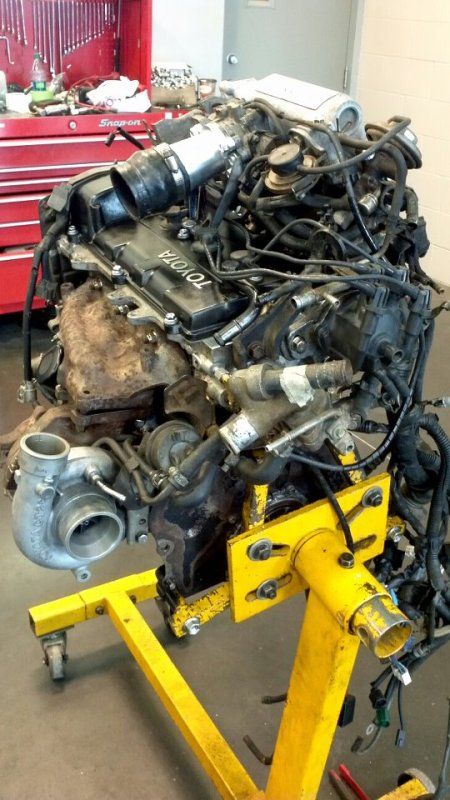
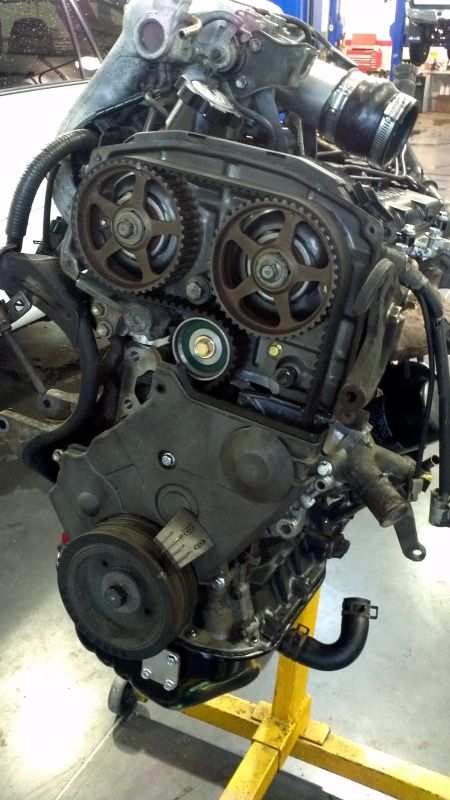
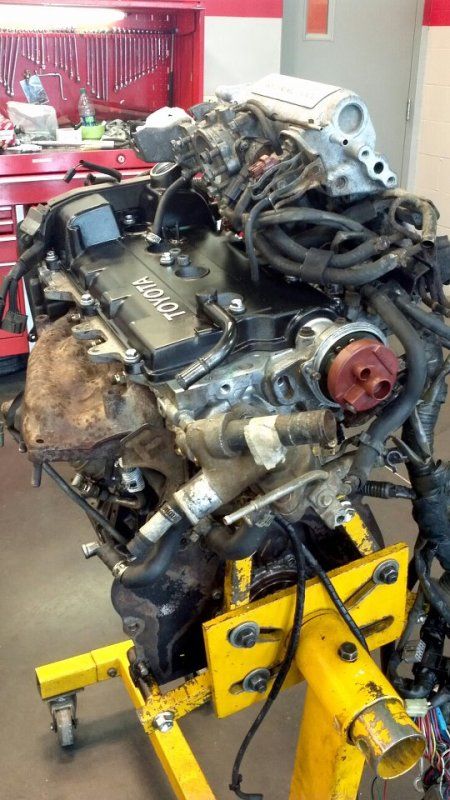
Pics:

Progress about halfway through the day:
Image

Progress right before the turbo cracked:
Image
-Sarah
1985 MR2 - R.I.P
1991 MR2 Turbo
2013 Scion FR-S
Apprentice Tech at Valley Toyota
User avatar
PearlWhiteMR2
Grandfather '2
 
Posts: 1775
Joined: Mon Dec 22, 2008 12:11 pm
Location: Mission, BC, Canada
Status: Offline

Re: Rebuilding a 3S.

Postby immorality » Mon Apr 23, 2012 9:53 pm

Awesome work Sarah, can't wait to see her on the road again.
User avatar
immorality
BCMR2 Web Admin & Executive Board Member
 
Posts: 9731
Joined: Thu Oct 31, 2002 1:32 pm
Location: Burnaby
Status: Offline

Re: Rebuilding a 3S.

Postby PearlWhiteMR2 » Mon Apr 23, 2012 9:54 pm

Thanks.. be nice if we weren't hitting so many snags but that's just the way it is with a 21 year old car.
-Sarah
1985 MR2 - R.I.P
1991 MR2 Turbo
2013 Scion FR-S
Apprentice Tech at Valley Toyota
User avatar
PearlWhiteMR2
Grandfather '2
 
Posts: 1775
Joined: Mon Dec 22, 2008 12:11 pm
Location: Mission, BC, Canada
Status: Offline

Re: Rebuilding a 3S.

Postby PearlWhiteMR2 » Tue Apr 24, 2012 9:21 pm

Today the tensioner came in and I put it on and got the timing belt in, and the lower timing belt cover and crank pulley as well. Almost there!

Managed to get the turbo flange welded, the shop is a very good shop and they said they didn't think it would be an issue in the future. Good news!

Image
-Sarah
1985 MR2 - R.I.P
1991 MR2 Turbo
2013 Scion FR-S
Apprentice Tech at Valley Toyota
User avatar
PearlWhiteMR2
Grandfather '2
 
Posts: 1775
Joined: Mon Dec 22, 2008 12:11 pm
Location: Mission, BC, Canada
Status: Offline

Re: Rebuilding a 3S.

Postby _mr2_ » Wed Apr 25, 2012 10:35 am

Nice block off plate DIY, WhT did he make it out of?
User avatar
_mr2_
Junior '2
 
Posts: 347
Joined: Tue Oct 14, 2008 7:42 pm
Location: Surrey, B.C
Status: Offline

Re: Rebuilding a 3S.

Postby PearlWhiteMR2 » Wed Apr 25, 2012 10:35 pm

Just a piece of scrap aluminum.

Today I picked up solid shifter bushings, a new hardline and upper timing belt cover because mine were missing/broken, and my pressure plate.

The turbo came back all welded, they didn't seem to think it would be an issue in the future. I'm really hoping it won't. Have to now plane both manifold and turbo flange surfaces to make a flat, smooth mating surface for them. Also ordered a brand new gasket since I was trying to re-use the old one.

Have to also fab a plug to coil wire because I'm using a 91 coil with a 93 distributor cap. That should be interesting!

And I'm still looking for a turbo stay, I was using a custom ghetto setup before so I don't want to be going back to that. If I can't find the original cast piece anywhere I'll just have to have help making one up. Will add more pictures as I progress! (If anybody is even reading this lol!)
-Sarah
1985 MR2 - R.I.P
1991 MR2 Turbo
2013 Scion FR-S
Apprentice Tech at Valley Toyota
User avatar
PearlWhiteMR2
Grandfather '2
 
Posts: 1775
Joined: Mon Dec 22, 2008 12:11 pm
Location: Mission, BC, Canada
Status: Offline

PreviousNext

Return to Do-it-yourself \ How-to

Who is online

Users browsing this forum: No registered users and 1 guest

cron