MK1.22 Build

Moderators: Administrator, Executive Members, Moderator Group

MK1.22 Build

Postby toyotaspeed90 » Thu Jun 30, 2011 7:13 pm

Well since many of the parts are from a member on this forum I figured I would throw up what's going on.

After 3 months and 3 engines in the wifes 86 MR2 (can't get rid of it -- too much sentimental value.... it was a graduation gift for my wife back in like 2005... then because of that when we got married our cake was an 'MR2 Cake'... anyways) and unable to find any importer locally who has a 16V 4age.... I came across Bill Strongs page regarding the MK1.22 build.

It doesn't look overly difficult but it also isn't going to be my first swap. In the "member MR2's" page you can also find my 87 hardtop / ae101 gze/megasquirted car (which I have still yet to find a 4agze that was megasquirted with the SC12 before this one.... I dare to say it was original).

The most difficult part will be mounting it into the car. I'm not entirely set on how this will go but only time will tell. So far I decided to do this on Sunday... now it's Thursday... the AW11 has started to come apart and my parts collecting has begun.

So far I have from a 91 MR2:
91 5SFE (complete as pulled, running), S54, portions of mounts
Axles, various electronic bits, starter, alternator
Various other pieces

I have 'on the way' a 91 Harness, ECU, and coolant fill pipe

I will be ordering one of the ebay headers. I will also probably have to order the coolant hoses on rockauto as Napa had a very small selection.... we will see.

I pulled the valve cover today on the 5s to change the gasket & spark plug tube seals. The head internally looks cleaner than the outside.... probably thanks to the lower revving engine. I also replaced the o-ring seal on the dizzy... though I think it's the inner seal that's leaking as there's signs of oil inside the cap itself. Oddly enough I have a spare 5sfe dizzy and it might not have the leak... I will have to look one of these days.

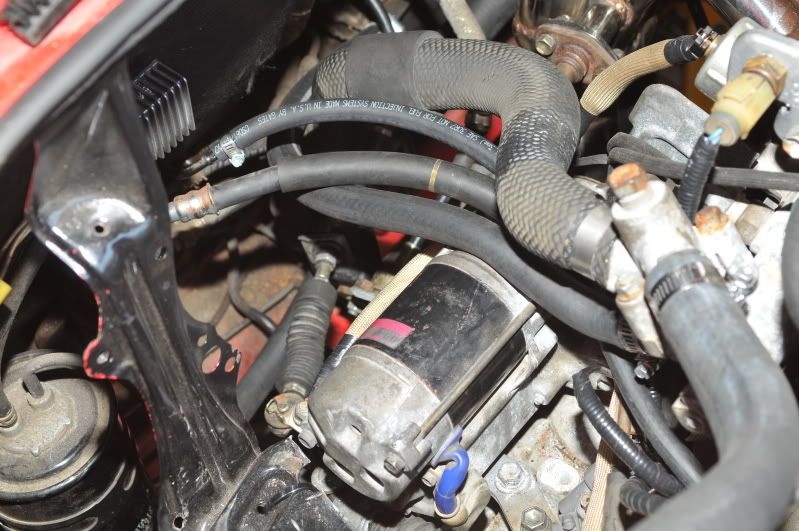
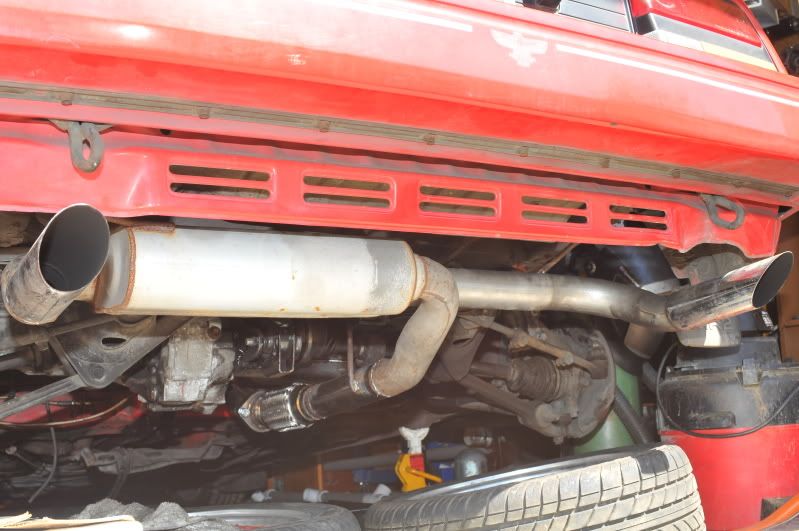
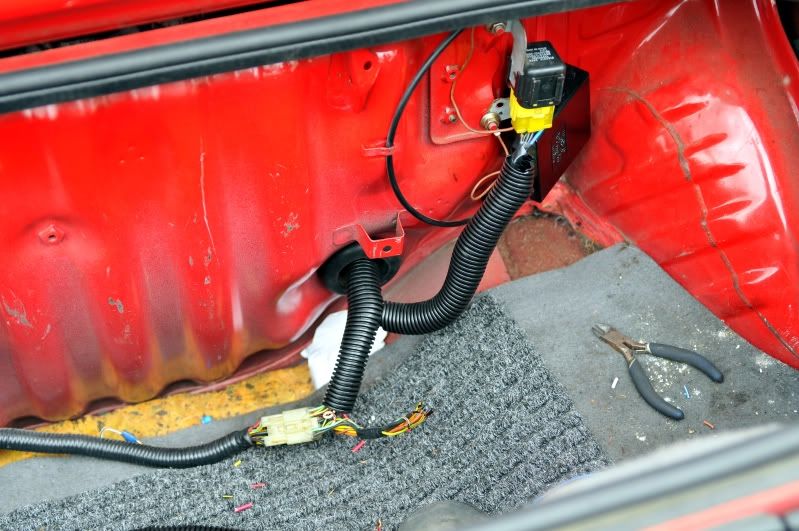
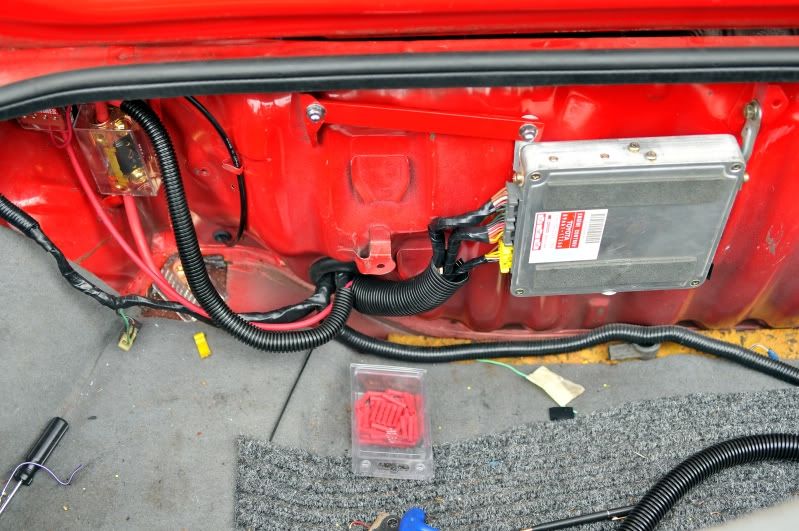
The AW11 has started to come apart... right now once axles & exhaust come out the engine is ready to come out. The unfortunate part is that I had painstakingly put a large amount of effort into fixing the alternator wiring and in doing so completely changing a large portion of the 4age harness. You'll see what it looks like below.

Photos aren't exciting by any means....
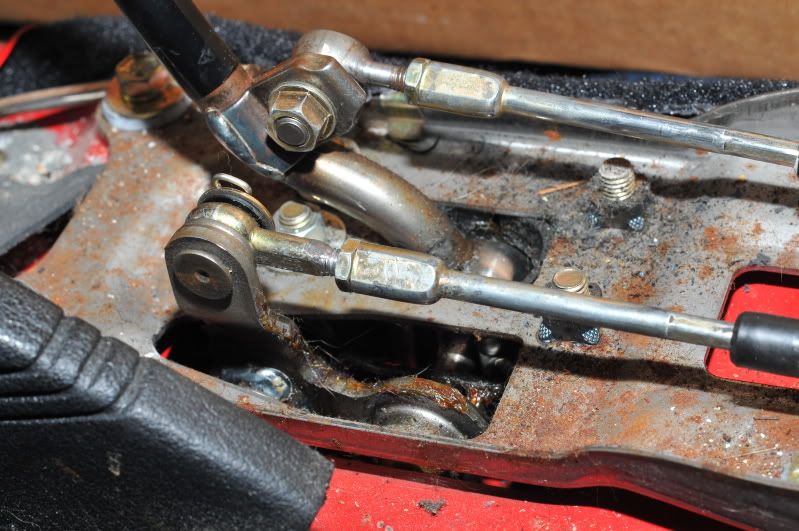
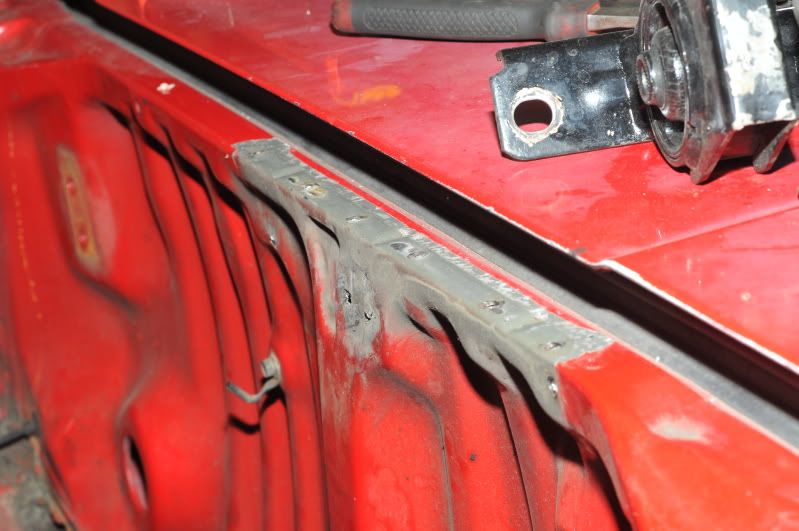
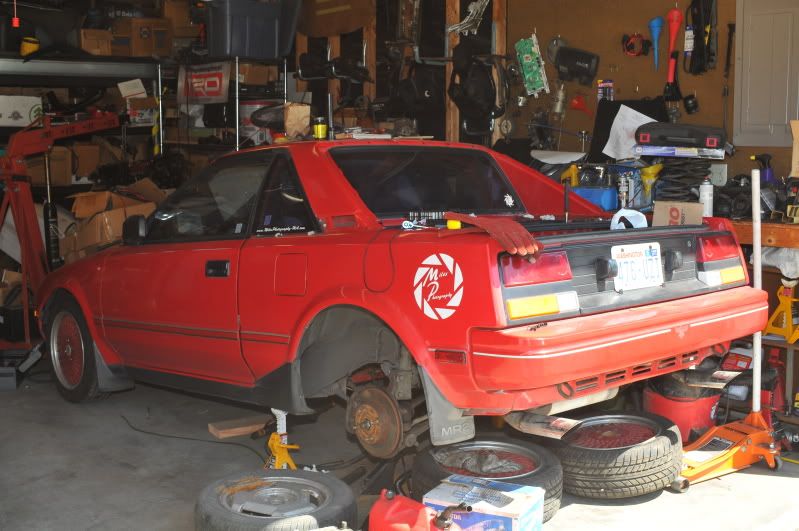
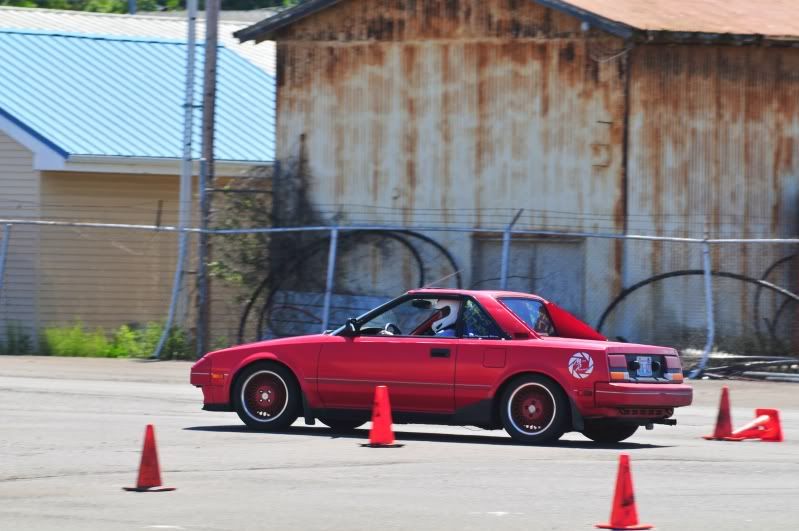
The car...
Image

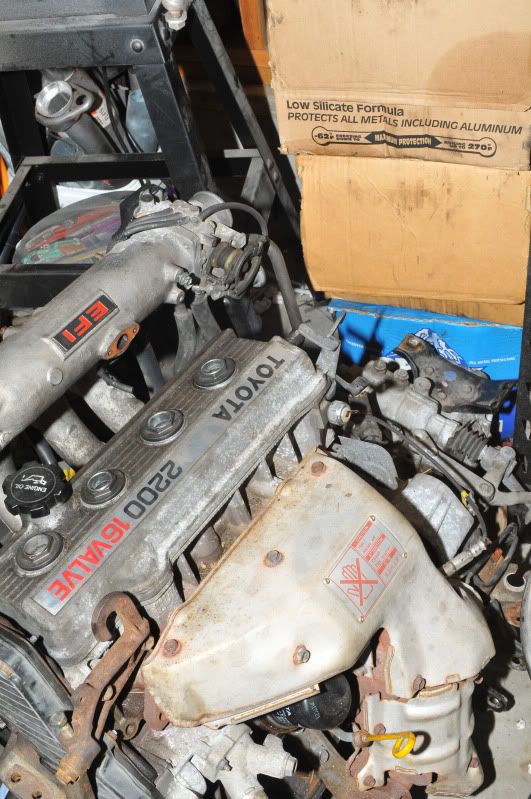
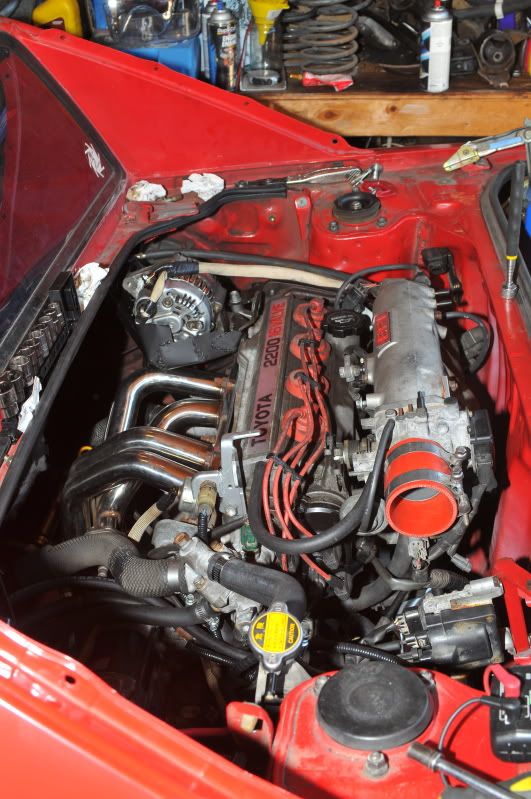
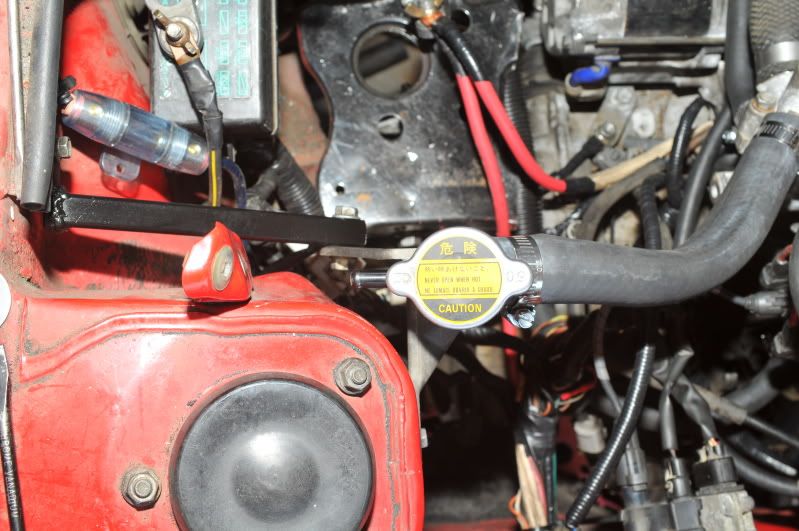
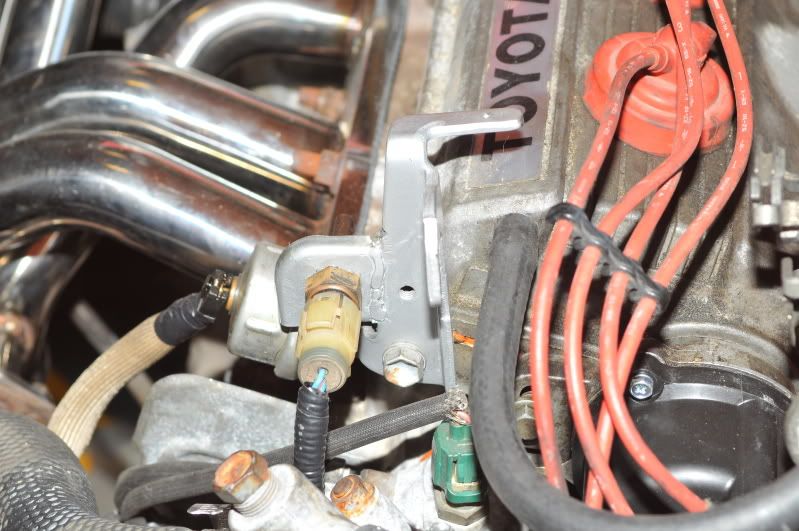
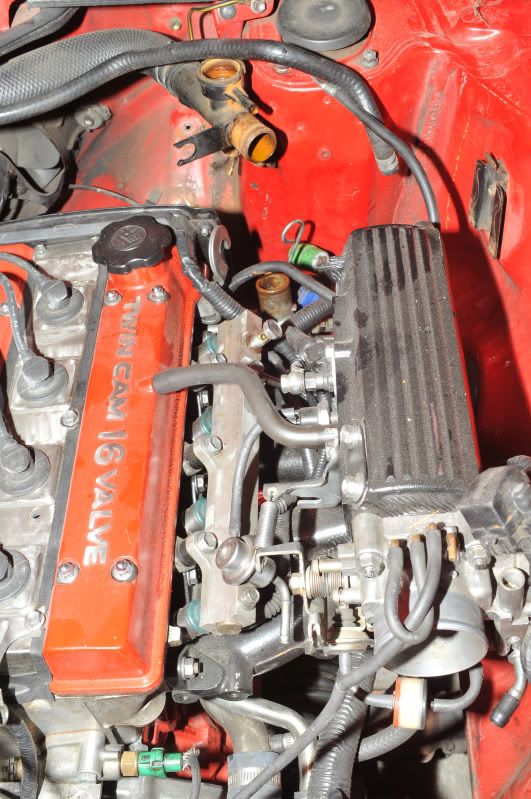
The AW11 engine as it sits now:
Image

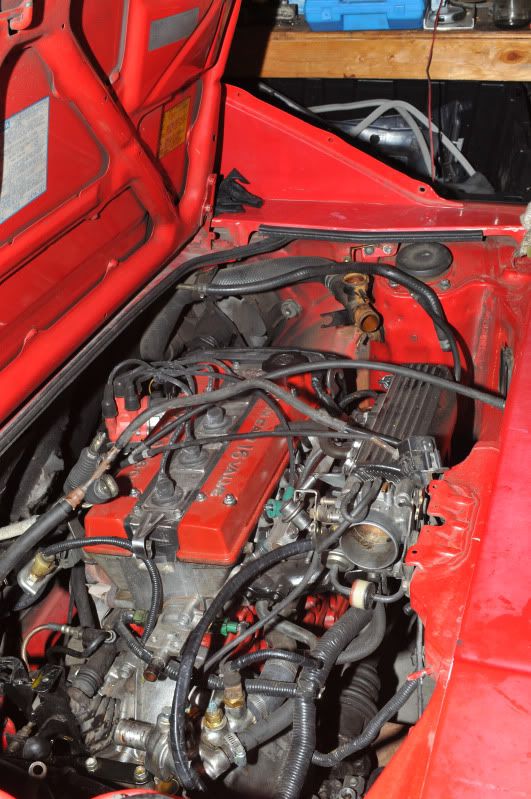
The wiring was rerouted under the intake manifold. Yes that's a smallport head. This was a JDM bigport block. Smallport head was cut 10 thou, new valve guide seals, and bigport cams. There were zero signs in this setup that t-vis was missing and above 4k you could tell it was a much better setup. Oh well, such is life.
Image

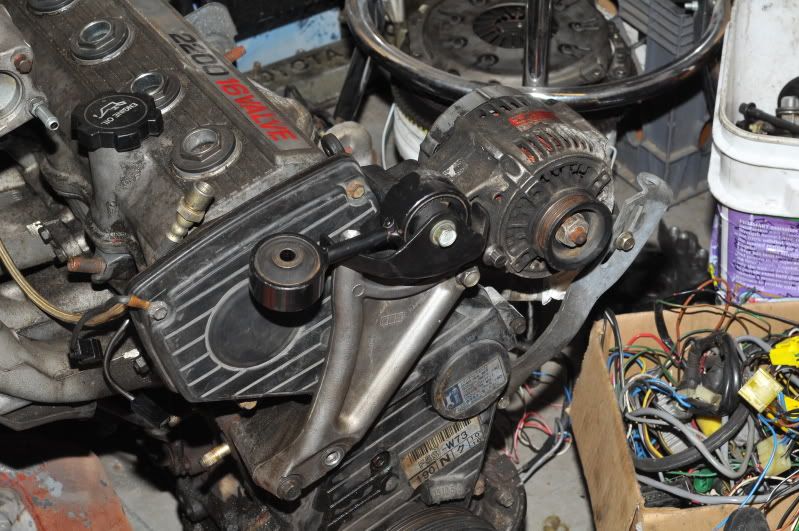
The 5s as it sits....
Image
toyotaspeed90
 
Posts: 30
Joined: Mon Jun 27, 2011 6:52 am
Status: Offline

Re: MK1.22 Build

Postby thelaw604 » Thu Jun 30, 2011 8:31 pm

Looks like a good project, look forward to more pictures!
thelaw604
Baby '2
 
Posts: 215
Joined: Fri Feb 27, 2009 5:01 pm
Status: Offline

Re: MK1.22 Build

Postby immorality » Fri Jul 01, 2011 9:26 am

+1! A 5s powered mk1 sounds like a blast.
User avatar
immorality
BCMR2 Web Admin & Executive Board Member
 
Posts: 9731
Joined: Thu Oct 31, 2002 1:32 pm
Location: Burnaby
Status: Offline

Re: MK1.22 Build

Postby PearlWhiteMR2 » Fri Jul 01, 2011 10:41 am

This is something I was considering for my 85, really looking forward to reading this thread!
-Sarah
1985 MR2 - R.I.P
1991 MR2 Turbo
2013 Scion FR-S
Apprentice Tech at Valley Toyota
User avatar
PearlWhiteMR2
Grandfather '2
 
Posts: 1775
Joined: Mon Dec 22, 2008 12:11 pm
Location: Mission, BC, Canada
Status: Offline

Re: MK1.22 Build

Postby toyotaspeed90 » Fri Jul 01, 2011 11:51 am

SO.... what's the redline of the 5sfe?

guessing around 6200=6300? Not a huge deal but I want to do something with the stock tach.... since it doesn't show redline until about 7600 or so....

the small things to do keep piling up.... oh well.
toyotaspeed90
 
Posts: 30
Joined: Mon Jun 27, 2011 6:52 am
Status: Offline

Re: MK1.22 Build

Postby toyotaspeed90 » Fri Jul 01, 2011 12:38 pm

just thinking out loud online here....

not sure what I'll do with all of the stuff/time I put into this car.... recently it got:
new clutch/pp... for a 200mm flywheel (I like them a lot better)
redid the wiring
new t-stat.... new water pump
the head is a smallport head, cut 10 thou, and bigport cams in it (shimmed)
rebuild dizzy (which is different than the leaky dizzy in the ae92/7age of course and the gze car, on MS, has no dizzy)
new belts....
new cap/rotor/wires from Toyota (the 7age has new parts already)
everything was cleaned up and painted or at least clear coated.... water lines, inlets/outlets, valve covers (which will probably just get added to my stash of about 20 4age valve covers), cam gears, alternator, hell even the throttle return spring...
the stock throttle cable bracket was removed... then I modifed what I had to make it all work (which actually included some cutting and welding)

it's almost depressing the amount of work that went into it for nothing.... probably have close to 100 hours in cleaning/painting.... this isn't my way of backing out of the swap.... but if anything might be the motivating factor to go forward... after all the time to do a good job along with making it look just as nice.... yet the 4age couldn't keep up with expectation and is the purpose of going forward with the 5sfe.

after it's got some mileage under it's belt I might consider cleaning up the valve covers or something along those lines...
toyotaspeed90
 
Posts: 30
Joined: Mon Jun 27, 2011 6:52 am
Status: Offline

Re: MK1.22 Build

Postby bbarnumboy » Fri Jul 01, 2011 12:40 pm

Hey Thom i know someone who is going to make a few sets of adapter plates, making it so you do not have to cut any mounts. And with that in mind, making it so you dont have to design your own. let me know if your interested. not sure his price but probably not a whole lot. you yould be able to swap back to a 4ag if you ever needed etc.
God created turbo lag to give the v8's a brief moment of hope
User avatar
bbarnumboy
MR2 know it all
 
Posts: 3097
Joined: Sat May 06, 2006 12:08 pm
Location: Everett, WA
Status: Offline

Re: MK1.22 Build

Postby toyotaspeed90 » Fri Jul 01, 2011 12:50 pm

ok, I will keep that in mind.

that being said... I will be needing them basically ASAP. Price will be a large factor....

I'm going to the Arlington PAP tomorrow... going to grab some random toyota engine mounts... along with my collection of aw11/ae92 mounts that I already have.

Our plan was to buy some raw steel then see what needed to be done and hopefully not cut the chasis mounts out. The person helping me is an extremely good welder and I trust his work....

if you've seen/heard of it he's the guy who did all of the logistics/cutting/aligning/welding/building of the STI Celaru project (2000's Celica body basically on top of an STI chasis that was put together for around 700whp).

http://www.iwsti.com/forums/gd-members- ... u-sti.html

(you have to scroll down a bit... the first several posts are just previous cars/builds)

In any event I'm not concerned about getting it done... I'm more concerned about where and when. I have the same welder he does but no tank (maybe it's time to get one)... I also don't have the space he does... but I don't know how he feels about me dragging the car to his place for this fabrication. All of the wiring/plumbing/etc will be done here no problem, though... but I also know that he doesn't have a drill press, which I do... (guess I could bring it with if I go to his place)
toyotaspeed90
 
Posts: 30
Joined: Mon Jun 27, 2011 6:52 am
Status: Offline

Re: MK1.22 Build

Postby toyotaspeed90 » Sun Jul 03, 2011 8:05 am

Engine/trans is out

at the pull-a-part (apparently now called the pick-n-pull) they were having a 20-50% sale on everything, lol.... ended up getting:

5 various mounts to try (apparently the camry mounts varied through the years)
Map Sensor
AIT sensor
exhaust-side alternator mount & slider bracket

all in all it was around $40

The wiring harness, sw20 coolant filler neck, and ecu showed up yesterday..... the cooler neck is very different than the AW11... I will have to see how this thing is plumbed in....

Ebay header is ordered.
toyotaspeed90
 
Posts: 30
Joined: Mon Jun 27, 2011 6:52 am
Status: Offline

Re: MK1.22 Build

Postby toyotaspeed90 » Mon Jul 04, 2011 3:25 pm

So we'll see how things progress..... next weekend is an auto-x in which I am the event chair.... so I'll have to spend Friday setting up, Saturday at the event, then sunday we're possibly having an added "practice" day. July 21-24 we'll be in Vegas.... so nothing will get done then.

the harness showed up and I started to hack it up a bit. I took my spare 86 AT harness out & started cutting it as well. The plan is to basically mate the SW20 harness into an MR2 engine harness to that when it connects to the body... it just plugs right in. We'll see how that goes.

So far a couple large differences I've seen are:

AW11 has the body connector in the trunk for the engine harness. It appears the SW20 has it in the engine bay near where the battery connector is

SW20 ecu has the 14pin connector that connects to the body harness in the trunk but is not a part of the engine harness. Luckily the AW11 harness I'm hacking up had the same 14pin connector -- which as I figured many of the wires from it connect directly to the AW11 trunk connector (that isn't to say they're right... I have yet to research anything)

I have cut the 4 necessary connectors out of the AW11 harness (the 2 grey connectors in the engine bay, the body in the trunk connector and the 14 pin ecu connector) with a decent chunk of pigtail left. I have also stripped portions of the SW20 harness apart.... the alternator will be rewired to the exhaust side and many of the body/power will be rewired to the trunk of the aw11.
toyotaspeed90
 
Posts: 30
Joined: Mon Jun 27, 2011 6:52 am
Status: Offline

Re: MK1.22 Build

Postby toyotaspeed90 » Tue Jul 05, 2011 6:05 pm

Today I drilled out the spot welds that hold the latch in place. Now I have a few holes to weld up then repaint that section.

I also pulled the stock exhaust manifold/cat. Installed the exhaust side alternator brackets and swapped the passenger (front) motormount on the engine to a much later Camry mount. This option looks WAY easier to work with.

Removed from the car other various things in the engine bay that might get in the way and/or will require relocating.

The shorter shift cable was removed. The cable that needs to be longer is only to move on one axis where-as the longer cable pivots in multi directions.... So I had to take the spare longer cable and make it the same on the shorter end. The longer cable had a threaded end on it... so I actually just cut the shorter cable about 1.5" from the end of it... took it to the grinder to make the end a bit smaller, tapped it, then threaded it into the longer cable. After install I now have a longer cable that pivots as needed.

Image

Image

we'll see if I end up using this mount.....
Image
toyotaspeed90
 
Posts: 30
Joined: Mon Jun 27, 2011 6:52 am
Status: Offline

Re: MK1.22 Build

Postby toyotaspeed90 » Fri Jul 15, 2011 8:56 am

Well the engine is now sitting in the bay (not mounted). It's sitting on several blocks of wood and the car is on the ground with wheel chocks. Axles are in for alignment purposes.

It looks like we might be able to fabricate the mounts without any sort of cutting of the chasis. Hopefully on Sunday we are able to build the mounts. The person helping me was throwing out the idea of creating a 2 piece passenger mount... one that mounts to both the stock mount location and also extends to the strut tower (similer to the stock camry dog bone). He thinks it will aid in adding structural integrity to the car, not just the mount. We'll see how odd/crazy we decide to get.

Brings me to wiring. I used the Paul Woods 3sgte/AW11 wiring as a guide, but not as a 'bible'. You need to understand that the 3sgte and early 5sfe pin outs on the ecu are completely different. If you start with that mindset you can work towards wiring. I used the AW11 BGB and the 91 BGB to aid. I created an excel spreadsheet to give me the following information regarding the 5sfe wiring:

Pin# Connector A (14)
1 +B1 (B-Y)
2 BATT (W-R)
3 VF (R-W) VF1 on check connector
4 FC (G-R)
5 ELS
6
7 PSCT (L-Y) Power Steering
8 +B (B-Y)
9 W (G-W) Check Engine (Comb. Meter)
10
11 AC (B-W) From A/C Magnetic Clutch Relay
12 SPD (V-W) To Speed Sensor
13 ACT (P-G) From A/C amplifier
14 PS (B) Power Steering


Pin# Connector B (10)
1 FPU (G-B) fuel pressure VSV
2 STJ (G) CSI / Timer Switch
3 STA (R-W)
4 #10 (W)- injectors
5 E01 (BR) ties to B10, B7
6 EGR (L-O) egr vsv
7 E1 (BR) ties to B5, B10
8 IGT (W) igniter
9 #20 (W) - injectors
10 E02 (BR) ties to B5, B7


Pin# Connector C (18)
1 THW ( R ) EFI Water Temp Sensor
2 PIM (LG-R) Vacuum Sensor / (MAP?)
3 THA (Y) In Air Temp Sensor
4 T (O) te1 on check connector
5 IGF (W-R) igniter
6 G1 ( R ) From dizzy
7 G- (B) From dizzy
8 OX1 (B) O2 sensor
9 RSC (G) ISC Valve
10 E2 (BR)
11 PSW (R-G) TPS
12 VC (R-L) Vacuum Sensor / (MAP?)
13 IDL (P) TPS
14 THG (B-Y) EGR Gas Temp Sensor
15 NE (W) From dizzy
16 E21 (BR) ties to C10
17 OX2 (B) sub O2, Calif
18 RSO ( R ) ISC Valve


Circuit Opening Relay
5SFE Colors AW11 Colors
EFI Main Relay ('const.' 12v) B-Y Black - red dash (2 wires)
STA 3B on 5SFE RED Black - red dash (1 wire)
L-B to Fuel Pump (AW11 N1 Pin 18) L-B L-B
to 5SFE ECU Pin 4A (FC) G-R
ground Wh-Bk


5SFE Starter Relay (4 pin in trunk)
1 R-W (TIES TO NEUTRAL START SWITCH)
2 W (BATTERY +)
3 through EA1 (7) to ground
4 B-W (starter switch, to starter)


Pin # EA1 (MT, Trunk) 12 Pin
1 XXX
2 G-R (3SGTE COR to FC on ECU)
3 L-O (3sgte engine bay temp sensor to Cooling fan ECU)
4 L (3sgte engine bay temp sensor to Cooling fan ECU)
5 L-W (3SGTE Cooling fan ECU to Comb Meter)
6
7 W-B (Ground for starter relay or to Theft Deterrent system)
8 R-G (Engine Hood Courtesy Switch, Theft Deterrent system)
9 V-Y (VF from ECU to R-W VF1 on Check Connector
10 V (From Cruise control ECU to Speed Sensor)
11 L-B (3SGTE turbo pressure sensor to Comb. Meter)
12 L-B (3SGTE Fuel pump to Check Connector #1 FP)


Pin # EA3 (Body) 18 Pin
1 W (IE3 to ID2, Center airbag sensor assembly & PS ECU, Cruise TC to C1 check connector)
2 Y (C1 Check connector to ABS ECU)
3 W-B (Ground, ties to water temp sensor, for Comb. Meter)
4 Y (Charge Warning Light, Comb. Meter)
5 B (Tach to #4 on igniter)
6 Y-G (Water temp sender for Comb. Meter)
7 Y-B (Oil Pressure switch for Comb. Meter)
8 R Clutch Start SW
9 BR-B (VSV for AC idle up #1 to AC amplifier)
10 Y-L (VSV for a/c Idle up #2 to A/C clutch relay)
11 R (3SGTE Engine Oil Level ECU, to EC1 to oil level sensor)
12 R-Y (C1 Check connector, airback warning light)
13 R-B (Back up lights, connects with EB1 #7)
14 BR (IAT sensor)
15 Y (IAT Sensor)
16 B-W (AC Magnet clutch to A/C Magnet clutch relay)
17 W-R (connects to 1A, S on IC Regulator, Alternator)
18 P (Engine ECU to Cruise Control ECU)


Pin # EB1 8 Pin
1 B-Y (From EFI Main Relay to ISC, EGR, VSV, +B on Check Connector
2 B-Y (EFI main relay to ISC Valve on AT cars)
3 G-W to BR (3sgte cooling fan relay G-W to cooling fan ECU BR)
4 BR (From #2 on Ignition main relay to injectors/Coil)
5 XXX
6 XXX
7 B-Y (Connects to 3A, L on IC Regulator, Alternator). To Back Up light switch to EA3 13. To Speed sensor for cruise control. 3SGTE to cooling fan ECU #3
8 L-B (From COR To FP on Check Connector)


i slightly deviated from Paul Wood's wiring of the COR. Don't cut off 1 of each pair of wires (if you've looked at the wiring this will make sense) from the AW11 COR. I believe there were multiple wires I had to run to STA anyways so instead of bundling them all onto 1 wire I was able to use the factory 2 wires (I could be wrong, it might be the other wire... either way I used it).

The fuel pump wire. There are 2 leads coming out of the COR on this. Don't cut the 2nd wire off.

On the SW20 EB1 8 pin body connector, pin #8 is blue and black and is supposed to connect to the diag port for the fuel pump. I didn't see anything about wiring this -- so I extended this wire to the 2nd fuel pump wire on the AW11 COR. This now allows me to use the diag port to jumper the fuel pump without having to trace any of the past wiring at the COR.


I have also retained the engine bay cooling fan. The relay/wiring is independant from the engine ECU and I didn't see a reason to ditch the fan. For some reason only the 88 engine bay cooling fan uses a speed sensor... the rest of them don't. I'm guessing if you have an 88 then you can just tie into the speed sensor coming from the gauges.
toyotaspeed90
 
Posts: 30
Joined: Mon Jun 27, 2011 6:52 am
Status: Offline

Re: MK1.22 Build

Postby toyotaspeed90 » Sun Jul 17, 2011 8:30 pm

well I have a few photos but I plan to take more when the motor is actually bolted in the car....

However today we did actually get somewhere.

The 2 side mounts have been fabricated (passenger side is bolted in, drivers side should be bolted in tomorrow).

For the passenger side mount:

The stock 'chasis-side' mount I flipped upside down and then rotated 90*... so instead of the 'studs' facing down they faced towards the side of the car/engine bay. Cut some thick square tubing to 7" long and drilled 2 large holes. I removed the studs from the mount and bored the holes out. The square tubing was bolted to the mount so that it went towards the strut tower. The stock Camry dogbone cradle... cut 1/2 the top off and flipped it upside down on the stock 5s camry (engine-side) mount. Then used some thicker wall rectangle tubing to weld between the modified stock mount and the square tubing. Voila, passenger mount is done. The only downside I see is that the bolt on the chasis is going to be a bit of a pain to get in/out. It was made with the alternator belt/location in mind so there shouldn't be any issues there.

The drivers side mount is fabricated and needs to be bolted in. Essentially we modified both lower 1/2's of the stock trans mounts and kept the stock AW11 upper 1/2. Both mounts had both ends cut off.... the center section of the SW mount was bolted to the trans. The chasis- side mount was installed and then we bolted in the aw11 lower 1/2's that we cut off. The SW and AW lower pieces were tacked together, removed and then welded together (there was a bit of an insert that was done on one side, however).

The front mount was cut and once the engine is hanging in the bay we'll be able to remove the wood blocks and get under the car to measure. The rear mount... planning to build a jig and then fabricate the entire trans-side of the mount to bolt into the stock AW11 rear mount.

This all sounds like a lot of work but it really isn't. Today took about 4 hours (which included running to Harbor Freight to get some better cuting wheels....and also included the WAY too long amounts of time it was taking to use the die-grinder and 4" cutoff wheels....) and hoping tomorrow only takes a couple more.


My plans to cut nothing off of the AW11 have gone through without a hitch thus far.....
toyotaspeed90
 
Posts: 30
Joined: Mon Jun 27, 2011 6:52 am
Status: Offline

Re: MK1.22 Build

Postby toyotaspeed90 » Wed Jul 20, 2011 1:52 pm

Photos to come soon... I'm working on getting it done more-so than documented.... :bash:

All 4 mounts are done (front and rear were very straight forward). Rear trans-side mount is friggen burly... could probably tow the car with it no problems. (it's in the same stock fashion where it's sort of a U shape... but the bottom was then boxed in and welded with the same 1/4" thick metal).

Motor had to come out though to get some other stuff done:

get wiring done (wrapped/loomed) and installed on the motor (almost done)
weld up the holes from drilling off the stock latch (done, primed, needs some paint.. will probably just spraypaint for now)
re-install the metal retainer and grommet for the shifter cables
fab up an upper mount for the alternator... apparently a Camry exhaust-side alt mount & an SW20 aftermarket header don't get along
fab a heat shield for the alt
Reinstall motor, figure out cooling lines
make changes to the gauges (minor)
install the locking hood pins
install the exhaust (it will be getting the black cars old single in/dual out setup... I hope it isn't as loud as it was on the 4agze.. if so, it might have to change)

I think that's most of it... seems to be mostly small stuff
toyotaspeed90
 
Posts: 30
Joined: Mon Jun 27, 2011 6:52 am
Status: Offline

Re: MK1.22 Build

Postby toyotaspeed90 » Fri Aug 12, 2011 1:18 pm

Apparently I haven't updated this in a while.....


It's a little bit further along..... as in.... done....

in the bay:
Image

tight squeeze but all is well:
Image

the exhaust is in:
Image

coil/ignitor bracket:
Image

coolant filler neck bracket:
Image

from afar (no longer on jackstand, though)
Image

coolant fan sensor bracket:
Image

the new (and now working) shifter cable modification:
Image

Image

and wiring (which has since been wrapped):
Image

Image
toyotaspeed90
 
Posts: 30
Joined: Mon Jun 27, 2011 6:52 am
Status: Offline


Return to Members MR2's & Build Threads

Who is online

Users browsing this forum: No registered users and 2 guests